Calendered Vinyl Wrap FAQs
Calendered vinyl wrap is one of the most widely used materials in the world of signage, decals, and vehicle wrapping. But despite its popularity, many people still ask, “What exactly is calendered vinyl?” and “Is it right for my project?” This blog will answer those common questions and more.
A calendered vinyl wrap is a type of PVC film created through a calendering process, where heated vinyl is rolled and flattened into sheets. It's known for being cost-effective, durable on flat surfaces, and available in a wide range of colors and finishes. Compared to premium cast vinyl, calendered vinyl is more affordable, making it a top choice for budget-conscious DIYers, commercial fleet wraps, and short- to mid-term graphics.
If you're looking to understand its pros, cons, lifespan, and whether calendered vinyl is the best fit for your wrap project, you're in the right place. This FAQ guide will cover everything you need to know.
Q: How is calendered vinyl made?
A: Calendered vinyl is manufactured using a method known as calendering. In this process, the raw materials, such as PVC resin, plasticizers, stabilizers, and pigments, are blended and heated until they form a thick, dough-like mixture. This mixture is then passed through a series of heated metal rollers that press and stretch the material into a thin, uniform sheet.
As it moves through the rollers, the vinyl takes on its final thickness, width, and surface finish, such as gloss or matte. Once the sheet cools, it is rolled up and prepared for use. The result is a vinyl film that is thicker and more rigid than cast vinyl. This type of production is efficient and economical, which is why calendered vinyl is widely used for cost-effective signage, decals, and wraps on flat or gently curved vehicle surfaces.
Q: How do you install a calendered vinyl wrap?
A: Installing a calendered vinyl wrap requires proper preparation, attention to detail, and the right tools to achieve a clean and professional finish. Below are the essential steps to follow:
Surface Preparation
Begin by thoroughly cleaning the surface where the vinyl will be applied. Remove all dirt, grease, and wax using isopropyl alcohol or a mild detergent solution. Make sure the area is completely dry before continuing. Any leftover residue or debris can cause bubbles or prevent the adhesive from bonding properly.
Positioning and Application
Measure and cut the vinyl slightly larger than the intended surface area. Peel back a small portion of the release liner and position the vinyl onto the surface. Use a felt-edged squeegee to apply the vinyl starting from the center and moving outward, working in small sections. Gradually remove the liner as you go, applying firm and overlapping strokes with the squeegee to eliminate any trapped air and ensure consistent pressure.
Heating and Conforming
If you need to apply the vinyl over slight curves, edges, or rivets, gently warm the material using a heat gun set to low. Heating the vinyl makes it more pliable and easier to shape around mild contours. Be careful not to overheat or overstretch the film, as this can lead to wrinkles or deformation.
Finishing Up
Once the vinyl is applied smoothly with no visible bubbles or creases, trim off any excess material using a sharp blade. Revisit all edges and seams with the squeegee or your fingers to ensure they are fully sealed. For added durability, lightly heat the edges and press them down firmly to reinforce the bond, a technique known as post-heating. As a final check, look for any remaining air bubbles. Small bubbles can be released by pricking them with a fine pin and gently smoothing the area.
Q: Can I install a calendered vinyl wrap myself, or should I hire a professional?
A: Yes, it is possible to install a calendered vinyl wrap on your own, especially if you’re working with smaller decals or applying the film to flat surfaces. Many DIY enthusiasts choose this option to save on labor costs and enjoy the hands-on experience. With the right tools, a clean workspace, and careful attention to technique, a self-installation can yield satisfactory results.
However, vinyl wrapping, especially on vehicles or large surfaces, can be challenging for beginners. Professional installers bring a high level of expertise that can make a noticeable difference in the outcome. They know how to properly stretch and shape the vinyl, how to manage curves and recessed areas, and how to prevent bubbles, creases, and edge lifting. A professional also has access to specialized tools such as squeegees, precision blades, heat guns, and edge sealers, and knows how to use them correctly to ensure a clean and lasting finish.
If you are wrapping a full vehicle or dealing with more complex shapes and surfaces, hiring a professional is highly recommended. For smaller jobs or temporary graphics, a DIY approach can work if you take the time to learn the process, practice beforehand, and follow each step carefully.
Q: How do I clean and care for a calendered vinyl wrap?
A: The best way to wash a wrapped surface, such as a vehicle, is by hand using a mixture of mild soap and water. A soft sponge or microfiber cloth is ideal for gently removing dirt and grime. After washing, rinse the surface thoroughly and allow it to air dry or gently pat it dry with a clean microfiber towel. Avoid scrubbing harshly, as this can damage the vinyl’s finish.
Do not use petroleum-based cleaners, harsh solvents, or rough pads, as these can discolor or degrade the vinyl over time. If your wrap has a matte or satin finish, avoid using any type of wax that adds shine, since it may alter the intended appearance.
Whenever possible, park your wrapped vehicle in shaded areas or indoors to protect it from prolonged sun exposure. Over time, ultraviolet rays can cause fading or premature wear. If the wrap comes into contact with bird droppings, bug splatter, or fuel spills, clean those areas promptly, as these substances can cause permanent stains if left untreated.
If you notice any lifted edges, bubbles, or minor tears, take care of them right away. In many cases, small issues can be corrected with gentle heat and pressure or a quick repair by a professional. With basic care and attention, a calendered vinyl wrap can maintain its vibrant appearance and performance throughout its expected lifespan.
Q: Can I take a wrapped vehicle through a car wash, or use a pressure washer on it?
A: It is possible to wash a wrapped vehicle at a car wash or with a pressure washer, but it must be done carefully to avoid damaging the vinyl. Automatic car washes that use spinning brushes are not recommended, as the brushes can scratch the surface of the wrap or catch the vinyl edges, leading to lifting or peeling. If you choose to use a commercial car wash, a touchless car wash that uses only water and soap without physical contact is a safer option. However, hand-washing remains the best and safest method for maintaining a vinyl wrap.
Pressure washing can be used, but it requires specific precautions. Keep the water pressure under 2000 psi, and always hold the spray nozzle at least 12 inches (30 centimeters) away from the surface. Direct the spray at a 90-degree angle to the surface rather than at an angle that could force water underneath the edges or seams. Also, ensure the water temperature is warm but not excessively hot—avoid temperatures above 180°F (82°C). Never allow the water to remain concentrated on one area for too long.
When done properly, a gentle pressure wash or touchless rinse can help clean larger wrapped areas effectively. Still, to preserve the wrap’s finish and prevent damage, it is always best to wash your vehicle by hand using mild soap, a soft cloth, and clean water.
Q: How long does a calendered vinyl wrap last?
A: Calendered vinyl is typically intended for medium-term applications, with an expected outdoor lifespan of three to five years under normal conditions. The actual durability depends on several factors, including the quality of the film, whether it is monomeric or polymeric, and the environmental exposure it experiences.
Lower-grade monomeric calendered vinyl tends to last around three to four years before it begins to shrink, harden, or show signs of cracking. In contrast, higher-quality polymeric calendered vinyl can often perform well for five to seven years, especially when applied to vertical surfaces and cared for properly.
Environmental exposure plays a significant role in longevity. Vinyl applied to horizontal surfaces, like hoods or roofs, which receive more direct sunlight and weather, will generally degrade faster than vinyl on vertical surfaces like doors or side panels. In hot, sunny climates, the material may begin to fade or crack closer to the lower end of its expected lifespan, while indoor use or milder weather can help the wrap last longer.
In most cases, signs of aging, such as color fading, gloss reduction, or minor edge shrinkage, start to appear after about five years, signaling that it may be time to consider replacement. With regular cleaning and protection from prolonged UV exposure, a calendered vinyl wrap can maintain its appearance and adhesion for several years.
Q: What is the difference between monomeric and polymeric calendered vinyl?
A: The key difference between monomeric and polymeric calendered vinyl lies in the type of plasticizers used during production, which directly affects the vinyl’s quality, stability, and performance.
Monomeric calendered vinyl uses lower molecular weight plasticizers, often referred to as short-chain plasticizers. These compounds are less stable and more prone to migrating out of the vinyl over time. As a result, monomeric films are more likely to become brittle, shrink, or crack, especially when exposed to outdoor conditions. They are generally thicker, around 3 to 4 mil, and tend to retain more "memory," meaning they try to return to their original shape. This limits their ability to conform to curves or textured surfaces. Monomeric vinyl is typically used for short-term or indoor applications such as promotional decals, temporary signage, or flat-surface graphics. Its outdoor durability usually ranges from 1 to 3 years, or up to 5 years under ideal conditions.
Polymeric calendered vinyl, by contrast, uses longer-chain, high-performance plasticizers that are more stable and better integrated into the vinyl matrix. These plasticizers are less likely to migrate, which makes polymeric films significantly more dimensionally stable and less prone to shrinkage. They are usually thinner, around 2.5 to 3 mil, and offer greater flexibility, allowing them to handle mild curves and more demanding outdoor environments. Polymeric vinyl is typically rated for 5 to 7 years of outdoor durability and is often considered an intermediate-grade film.
Q: What are common problems with calendered vinyl wraps, and how can I fix or prevent them?
A: Calendered vinyl wraps are a practical choice for many applications, but they do come with certain limitations. For Example.
Edge Shrinkage and Lifting
Over time, calendered vinyl may shrink slightly due to internal tension within the film. This can cause the edges to pull back, exposing adhesive and sometimes leaving a visible dirt line. To prevent this, avoid overstretching the vinyl during installation. If possible, wrap the film around the edge of a panel instead of ending it flush with the edge. Using an adhesive primer or edge sealer during installation also helps keep the vinyl secure. If you notice minor lifting, try gently heating the edge and pressing it back down. In cases where the vinyl has shrunk significantly, the affected section may need to be trimmed or replaced.
Air Bubbles Under the Vinyl
Air bubbles are a common installation issue, especially with calendered vinyl that lacks advanced air-release channels. To avoid them, work slowly and methodically, pressing the vinyl down from the center outward using a squeegee. If a bubble forms, do not continue pressing on it. Instead, lift the vinyl slightly to release the trapped air and reapply it. Small remaining bubbles can be punctured with a fine pin and smoothed out. Always ensure the surface is clean before installation, as dust particles can also cause trapped air pockets.
Wrinkles or Tunnels
Wrinkles often appear when the vinyl is applied too quickly or stretched unevenly across a surface. Tunneling can happen when vinyl bridges over a curved area without enough relief or heat. To correct a wrinkle during installation, lift the affected section, apply gentle heat to relax the vinyl, and then reapply with smooth, even pressure. Prevent these issues by warming the vinyl slightly before applying it to curves and by making small relief cuts where needed. If wrinkles are left uncorrected and the vinyl sets in that position, the only solution may be to replace that section.
Lifting on Curves or Complex Surfaces
Calendered vinyl is less flexible than cast vinyl, so it tends to struggle with deep curves or recessed areas. If forced into a complex shape, it may eventually lift or return to its original form. The best way to prevent this is to avoid overstretching. Instead, use cast vinyl on curved sections, or break the design into smaller panels with seams to reduce stress on the material. Once the vinyl lifts in a recessed area, reapplying it is usually a temporary fix. Replacing the section or using a more conformable film is often necessary for a lasting solution.
Tenting or Lifting over Rivets
Calendered film may tent over rivets instead of conforming to them, leaving a bubble or raised area. During installation, apply gentle heat and use a rivet brush or roller to press the vinyl tightly around each rivet. If tenting occurs afterward, you can puncture the bubble with a pin, apply heat, and press the vinyl down. Using adhesive primer around rivets before installation can also help improve adhesion. Cast vinyl typically performs better in these situations due to its greater stretchability.
Cracking and UV Degradation
As calendered vinyl ages, especially in harsh sunlight, it can begin to crack, fade, or lose its finish. This is particularly true for low-grade monomeric films. The best way to delay this is by choosing a high-quality polymeric vinyl and applying a UV-protective overlaminate. Parking the vehicle in shaded areas or indoors will also help minimize sun damage. Once the vinyl has cracked or severely faded, it cannot be restored and will need to be replaced.
Difficult Removal and Adhesive Residue
If a calendered vinyl wrap is left on too long, it may become brittle and break apart during removal. This can leave behind a sticky residue and make the removal process time-consuming. To prevent this, follow the manufacturer’s recommended service life and avoid exceeding it. When it’s time to remove the vinyl, apply moderate heat to soften the adhesive and make peeling easier. Any leftover residue can be cleaned with an adhesive remover designed for vinyl films.
Q: Where is calendered vinyl wrap typically used?
A: Calendered vinyl is commonly used in a wide range of applications, especially when the surface is flat or only slightly curved and when cost-efficiency or short- to medium-term durability is a priority. Its versatility and affordability make it a popular choice across several industries. Here are some of the most common uses:
Outdoor Signs and Banners
Calendered vinyl is frequently used for creating outdoor signage, including billboards, real estate signs, event banners, and promotional graphics. It adheres well to rigid surfaces such as metal, plastic, and composite panels, making it ideal for exterior signboards. With proper installation and care, calendered vinyl can withstand weather exposure for several years, making it a practical and cost-effective solution for temporary to medium-term outdoor advertising.
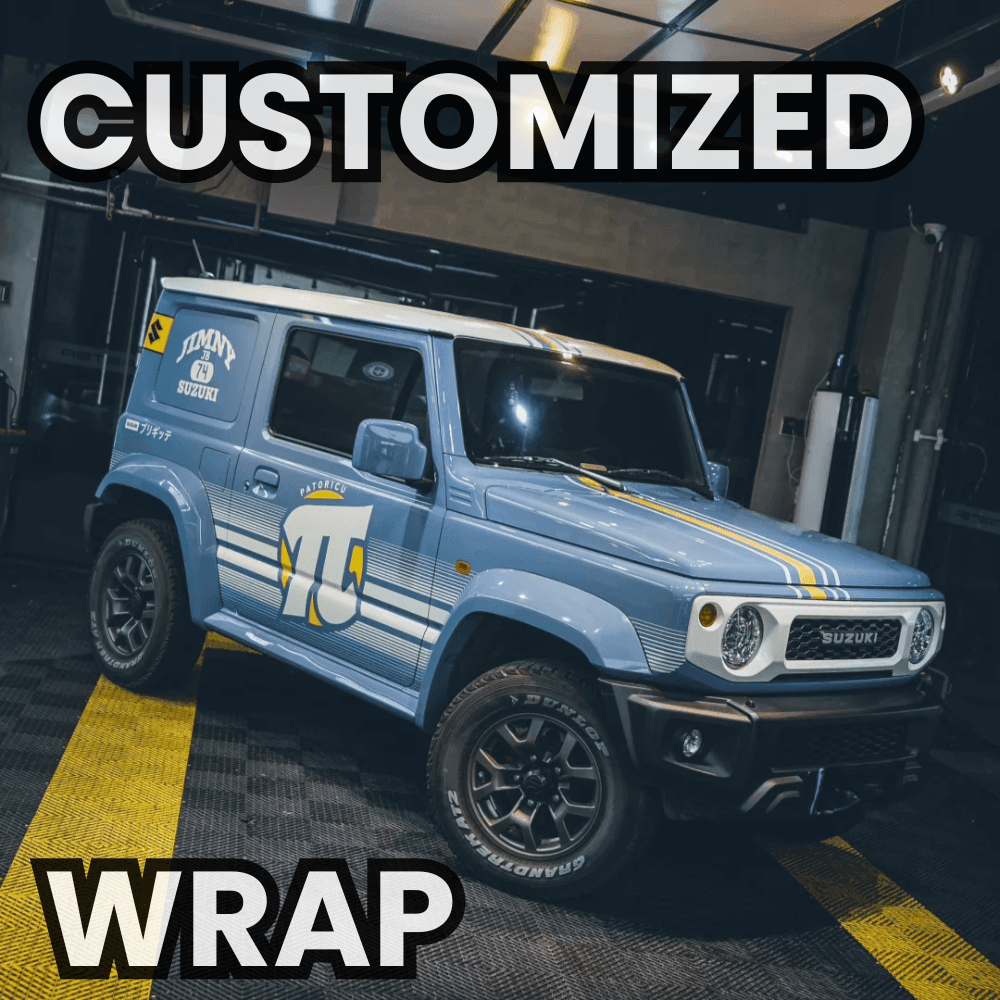
Vehicle Graphics (Partial Wraps and Decals)
This type of vinyl is well suited for partial vehicle wraps, lettering, and decals on commercial vehicles, especially on surfaces that are flat or only mildly contoured. For example, vans, trucks, trailers, and box trucks with large flat panels are excellent candidates for calendered vinyl graphics. It is often used for adding logos, contact information, promotional messages, or decorative stripes. While calendered vinyl can handle simple curves, it is generally not recommended for full vehicle wraps on cars with complex shapes.
Wall Murals and Interior Décor
Calendered vinyl is a popular choice for interior design applications such as wall murals, branded environments, and decorative graphics. It applies well to smooth interior surfaces like painted drywall, glass, and furniture. Businesses often use it in office spaces, retail stores, and trade show booths to display artwork, slogans, or branding. Since it is easy to install and remove, it is also well suited for temporary setups or leased spaces where permanent changes are not allowed.
Window Graphics and Decals
This material performs reliably on glass, making it a go-to for window graphics and decals. Storefronts often display sale announcements, business hours, or logos using calendered vinyl lettering. It can also be used with perforated window films for one-way visibility in both vehicles and commercial spaces. Because it resists moisture and adheres smoothly to glass, it provides a clean and professional appearance for short-to-mid-term use.
Labels, Stickers, and Product Decals
Calendered vinyl is commonly used to produce custom stickers, equipment decals, and product labels. It prints well with most standard ink systems and is available in a variety of finishes and colors. Businesses often choose it for branding promotional items, product packaging, and giveaways. These vinyl decals can be cut into virtually any shape and stick well to laptops, packaging, smooth containers, and other flat surfaces.
Floor Graphics
Some calendered vinyl products are designed specifically for short-term floor graphics, often paired with a slip-resistant laminate. These are used for directing foot traffic, marking social distancing, or promoting events within retail or public spaces. Although they are not as durable as cast vinyl options, calendered floor graphics provide excellent short-term visibility and withstand regular foot traffic when properly laminated.
Q: Can calendered vinyl be used for full vehicle wraps?
A: Yes, calendered vinyl can be used for full vehicle wraps, but with important limitations. High-quality polymeric calendered films are suitable for wrapping vehicles that have mostly flat or gently curved surfaces, such as box trucks, delivery vans, or trailers. In these cases, calendered vinyl offers a cost-effective solution with acceptable durability and appearance.
However, when it comes to wrapping complex vehicle shapes, such as sedans, SUVs, or sports cars with deep contours, recessed areas, and tight curves, calendered vinyl is much more difficult to work with. It does not stretch or conform as easily as cast vinyl, and if overstretched, it may lift, shrink, or even crack over time. Attempting a full wrap on a complex vehicle using calendered vinyl requires a high level of skill.
Q: Is calendered vinyl more cost-effective than cast vinyl?
A: Yes, calendered vinyl is generally more cost-effective than cast vinyl, making it a popular choice for projects where budget is a primary concern. On average, calendered vinyl is 20 to 50 percent less expensive per square foot than cast vinyl, depending on the brand and product specifications. This lower cost can make a significant difference when covering large areas or producing multiple graphics.
For short-term applications, such as temporary signage, promotional wraps, or seasonal advertising, calendered vinyl offers a strong balance between affordability and visual performance. It allows installers and businesses to complete projects within a tighter budget while still achieving a clean, professional look.
Q: Will a vinyl wrap damage my vehicle’s paint?
A: When applied and removed correctly, a vinyl wrap should not damage factory paint. In fact, it often acts as a protective layer, shielding the paint from UV exposure, minor scratches, and environmental contaminants. High-quality vinyl wraps are engineered with adhesives that bond securely to painted surfaces but are also designed to be removed cleanly. In most cases, removing the wrap within its recommended service life will leave the original paint intact—and in some cases, in better condition than areas that were not covered.
However, to ensure there is no damage, a few important factors should be considered:
Paint Condition Matters
Vinyl wrap adhesive is formulated not to harm factory-original paint that is in good condition. If the paint is solid, smooth, and free of defects, applying a wrap is very safe. But if the surface already has issues, such as flaking clear coat, rust spots, or poorly executed aftermarket paint, there is a higher risk. When a wrap adheres to weakened or damaged paint, it may pull some of that paint off during removal. For example, wrapping over an area with peeling clear coat or improperly cured paint can lead to further delamination when the vinyl is taken off. It’s important not to use a vinyl wrap to conceal existing paint damage. If there are known problem areas, they should be repaired before wrapping.
Installation and Removal Technique
Paint damage can also occur due to poor technique. Removing a wrap without the proper tools or approach can lead to chipping or tearing. The correct method involves using gentle heat to soften the adhesive and slowly peeling the vinyl at a shallow angle. Pulling cold vinyl off quickly or at a sharp angle can lift paint or leave behind adhesive residue. Additionally, during installation, inexperienced installers may accidentally score the paint when trimming the film. Professionals use tools like knifeless tape or controlled blade techniques to avoid cutting into the paint.
Duration of Wrap on Vehicle
Vinyl wraps have a recommended service life, typically around 3 to 5 years. Leaving a wrap on much longer than that can increase the risk of damage. Over time, vinyl becomes more brittle and the adhesive may become harder to remove. If removal is attempted after the wrap has aged significantly, it may break apart in small pieces or leave stubborn residue, increasing the chances of harming the underlying paint. To avoid this, always remove or replace the wrap within the manufacturer’s recommended timeframe.
Final Thoughts: Is Calendered Vinyl Right for You?
Calendered vinyl is a smart and practical choice for many applications, especially if you are looking for a cost-effective solution without sacrificing visual impact. It performs well on flat or gently curved surfaces, making it ideal for uses like signage, wall graphics, window decals, labels, and vehicle wraps. With a wide variety of colors, finishes, and printable options, calendered vinyl can help bring your brand or design to life while staying within budget.
Looking for affordable and easy-to-use vinyl? Browse our selection of premium calendered vinyl wraps and find the perfect film for your next project. Whether you're creating eye-catching signage, updating your vehicle graphics, or designing custom decals, our high-quality calendered films deliver reliable performance and vibrant results—at a price that works for you.
Related Resources:
How Are Yeswrap Vinyl Wraps Made?
How to Protect Your Car Wrap from Fading?
Where Can Vinyl Wraps Be Installed?
When to Remove or Replace Car Wrap
How Long Does Vinyl Car Wrap Last